Running your own Cellframe node on Raspberry Pi 2/3/4/400 (The easy way)
Category: Guide

This article was originally written by Mika Hyttinen. Medium link: https://medium.com/@mika.hyttinen
Okay folks, some of you have probably read my earlier tutorial for building and installing Cellframe node on a Raspberry Pi. Time has passed and nowadays Cellframe is providing builds for arm64 and armhf architectures, so in this tutorial we’ll be using their own repositories, which is the easiest possible way to download and update the Cellframe node.
About Cellframe
Cellframe is an ambitious third generation blockchain project and few people (me included) have already started to talk about it as the next Polkadot or Kusama.
This project is, however, more service oriented and has some advantages compared to Polkadot/Kusama (eg. post-quantum cryptography, 2-level sharding, P2P cross-chain operations).
Cellframe is written in C (which will make it FAST), and it has an SDK for C and Python at the moment. More supported languages are coming in the future.
I really recommend visiting their website (https://cellframe.net) and read their whitepaper!
Prerequisites
- Raspberry Pi 2/3/4/400 (In this tutorial, we are using arm64 build of Raspberry Pi OS)
- SD card (32Gb+ recommended for now) or even better, SSD (Choose quality: I recommend Samsung EVO+)¹
- A SD card reader
- USB keyboard
- Raspberry Pi Imager software from https://www.raspberrypi.com/software/
- Internet connection
- OPTIONAL: HDMI display (monitor, tv etc.)
¹ Although SSD is recommended, you need to do some extra configuration before you can actually boot from SSD. Google is your friend for these instructions.
Let’s go!
First and most important step
If you have created a wallet, you might want to backup it if something goes wrong.
You can backup the wallet directory to your home directory with the following command:
cp -r /opt/cellframe-node/var/lib/wallet ~
After you’re done, you can restore your wallet with the following command:
cp -r ~/wallet /opt/cellframe-node/var/lib/
Installing the operating system to the SD card
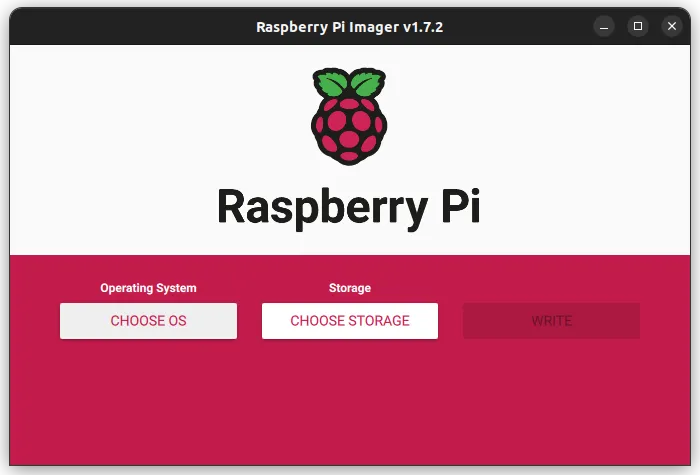
First you need to install Raspberry Pi Imager to your PC/Mac. After you are done, put your SD card to your SD card reader (NOTE: You should also connect the SD card reader to your PC or Mac if you’re using an external one 😉).
After those steps are done, open Raspberry Pi Imager and you will be greeted with a window like this:

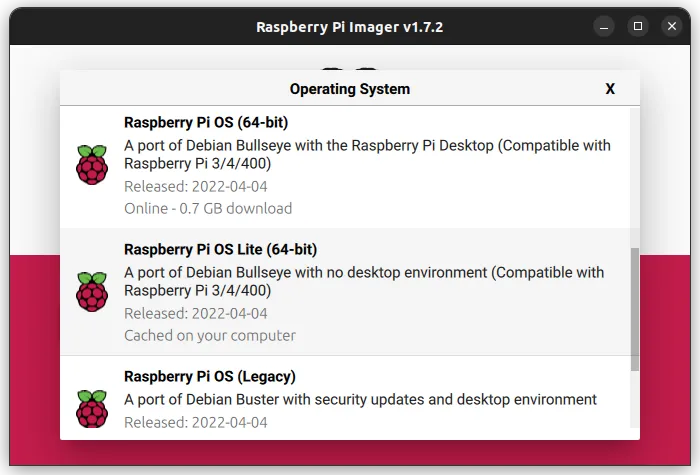
Now, click on "Choose OS", then click "Raspberry Pi OS (other)" and scroll down until you see "Raspberry Pi OS Lite (64-bit)".

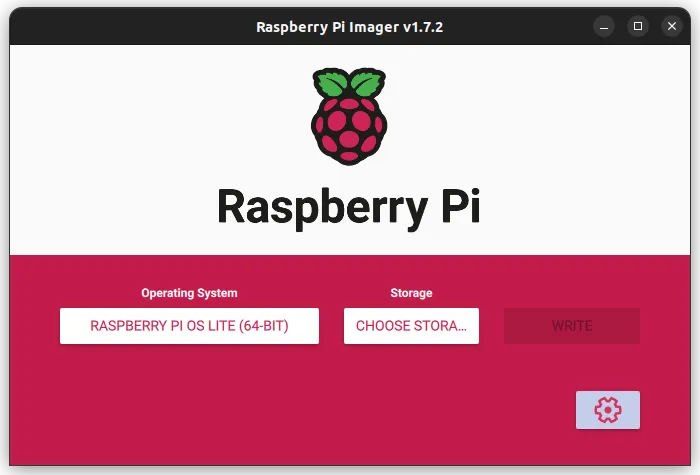
After you have clicked the correct OS selection, you will be returned to the main window.
Now it might be a good idea to enable SSH, changing the default user and password and if you want, you can also enable wireless LAN before booting up to your fresh Raspberry Pi OS. So click on the “gear button” on the bottom right of the Raspberry Pi Imager window:

And a new window will pop up:

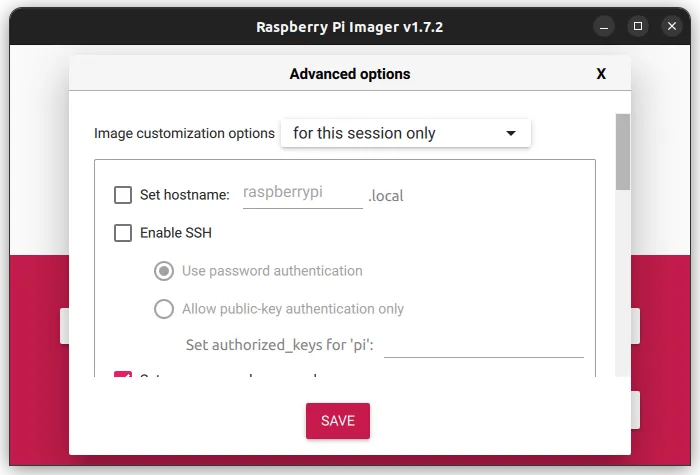
The settings you might want to enable here are the following:
- Enable SSH- This should be ticked so you can remotely connect to your Raspberry Pi
- Set username and password- Set these to something else than default
- Configure wireless LAN- Change these to be the same like your local WiFi settings
- Set locale settings- Configure local time zone and keyboard layout
After your done, click save and then click “Choose Storage” and you should see a window similar to this:

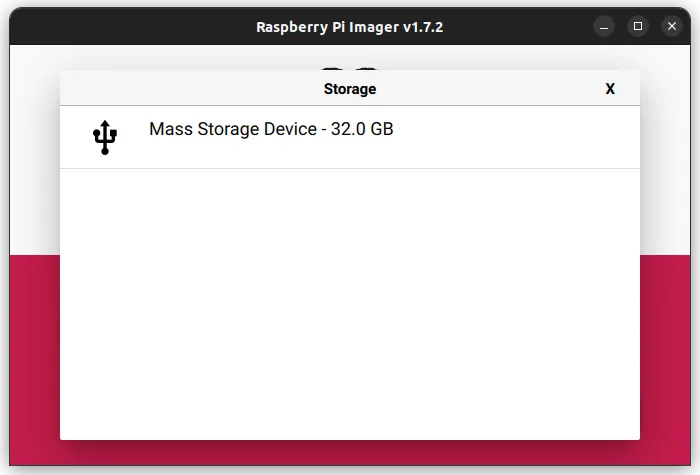
Select the correct mass storage device by clicking it and then click “Write”.

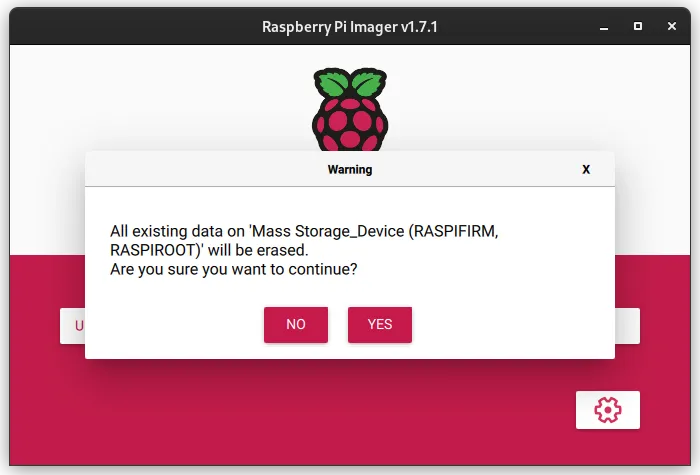
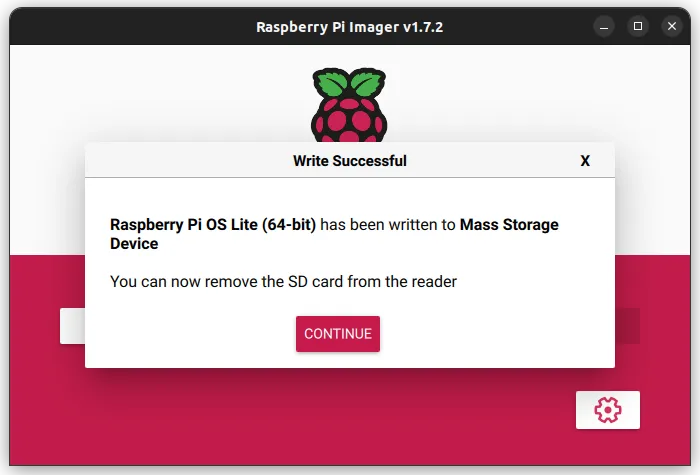
Please make sure you have selected the correct device before clicking the “Yes” button. After you press yes, go grab a cup of coffee, have a beer etc. It takes a while to flash the image to the SD card. After it’s finished, remove the SD card and insert it to your Raspberry Pi.

Booting up, and upgrading the installation
After you have inserted the SD card to your Raspberry Pi, plug in also your keyboard, display, network cable and power cable. Things are about to get serious 😆.
(Note: If you’re connecting to your Raspberry Pi via SSH, you will get a warning about the authenticity of host. When it asks “Are you sure you want to continue connecting (yes/no/[fingerprint])?”, just type in yes and press enter.)
Wait until you see the login screen. When you see it, just type your login credentials (press enter after username and password) which you added before writing the image to the SD card and and you will be logged in.
(Note: The cursor won’t move when you type the password.)
After you have logged in, it’s time to upgrade your installation with sudo apt update && sudo apt -y dist-upgrade
(Note: When using sudo in front of commands, you get elevated rights to your system (as in root user rights). It might ask you for your password so if this happens, just type in your password and press enter.)
After the installation is done, reboot your Raspberry Pi with the command sudo reboot.
Setting up Demlabs repository for installing Cellframe node
After you have rebooted and logged in once again, it’s time to set up the official repositories which allows you to download and upgrade the node with simple apt commands:
- Add Demlabs public key to your trusted keys with the command:
wget -O- https://debian.pub.demlabs.net/public/public-key.gpg | gpg --dearmor | sudo tee /usr/share/keyrings/demlabs-archive-keyring.gpg - Add Demlabs repository to your sources with the following command:
echo "deb [signed-by=/usr/share/keyrings/demlabs-archive-keyring.gpg] https://debian.pub.demlabs.net/public $(lsb_release -cs) main" | sudo tee /etc/apt/sources.list.d/demlabs.list - Now you are ready to install the node with the following command(s):
sudo apt update && sudo apt install cellframe-node
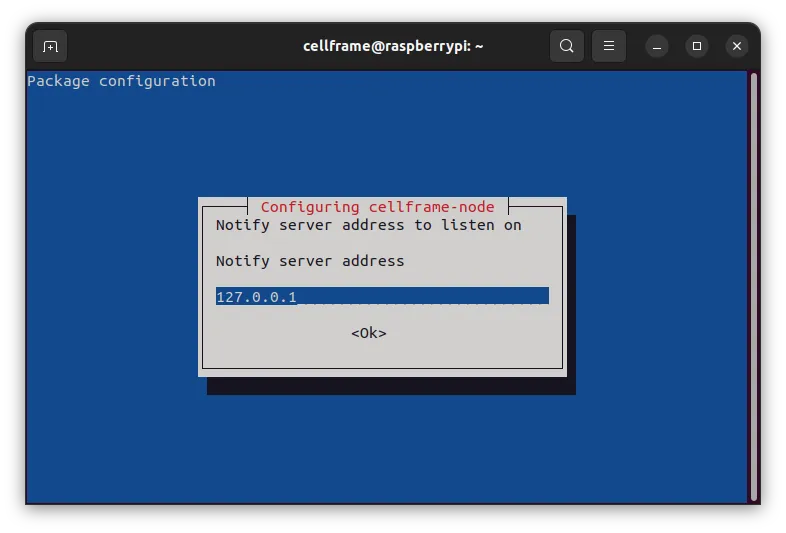
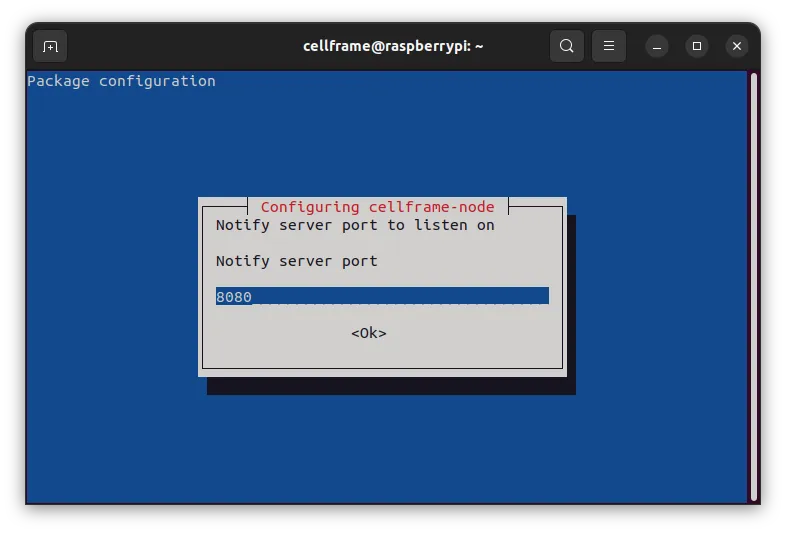
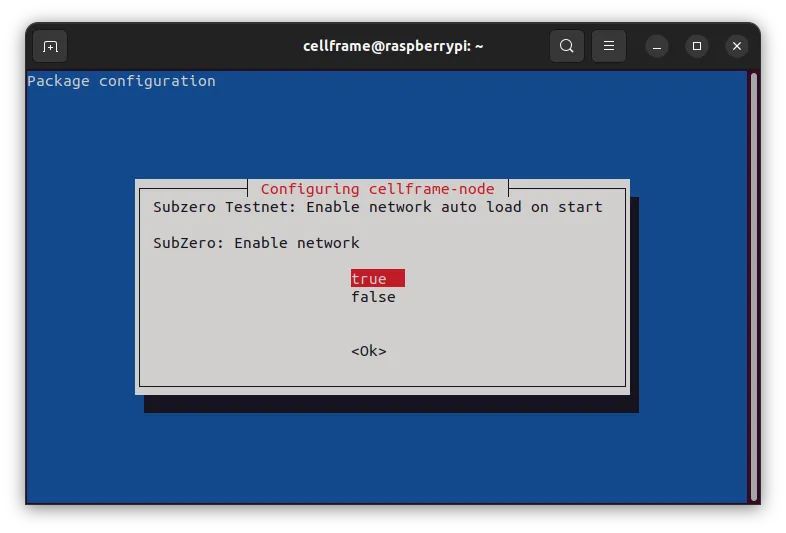
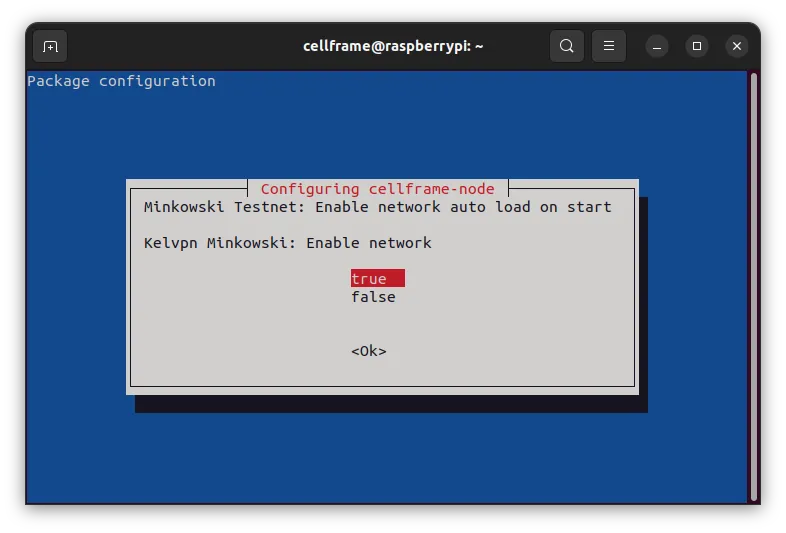
Before the installation finishes, it will ask you a couple of questions. Select the correct option and press enter.

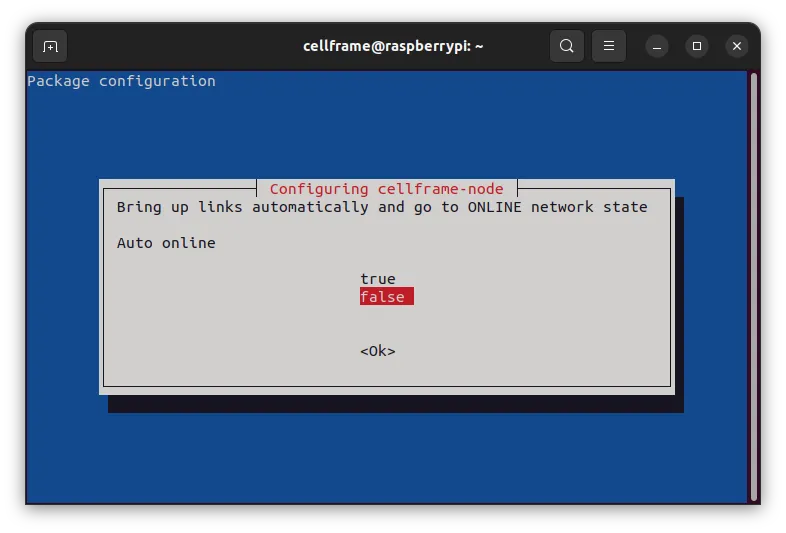

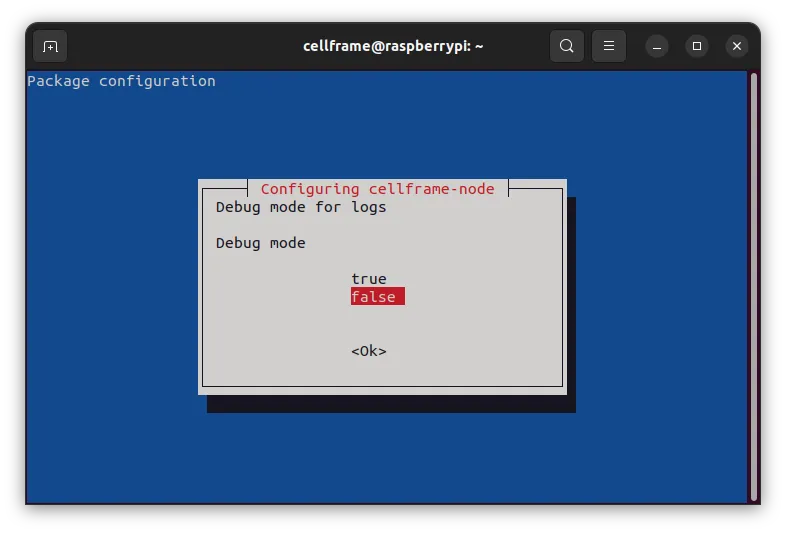

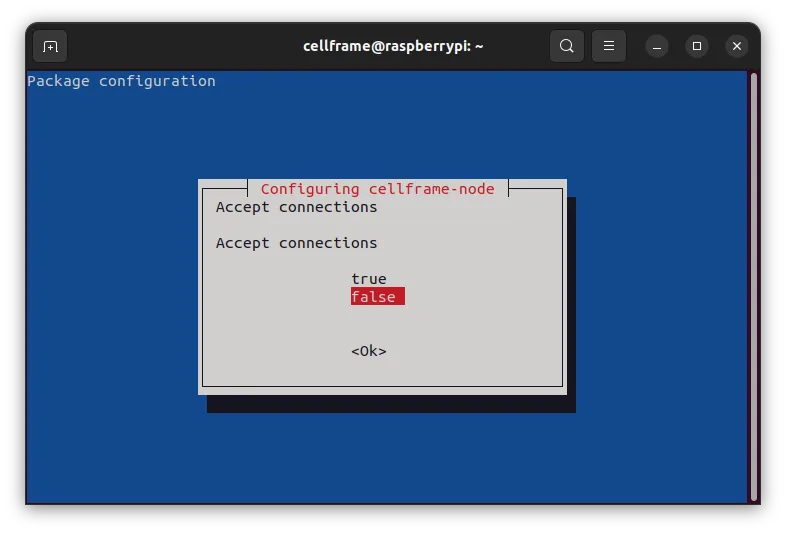

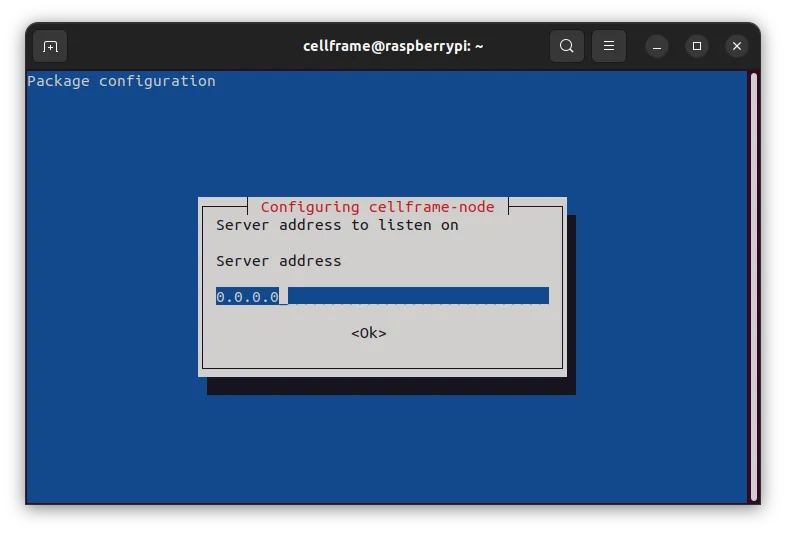

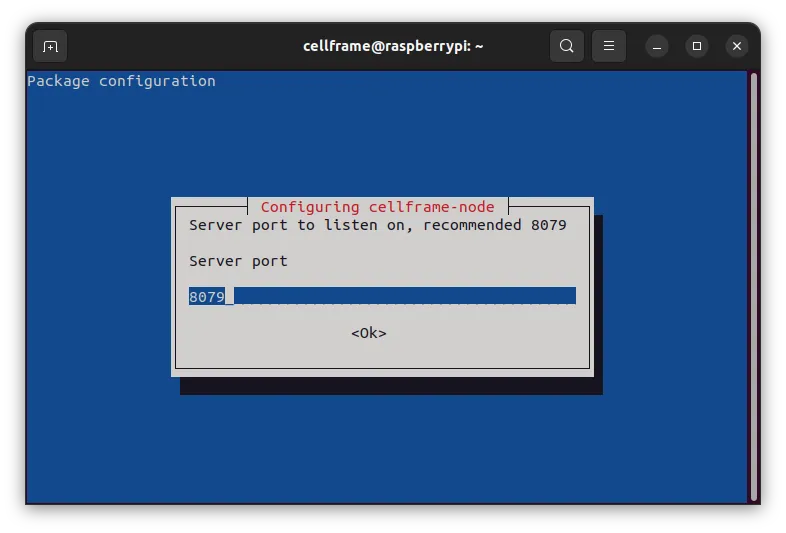


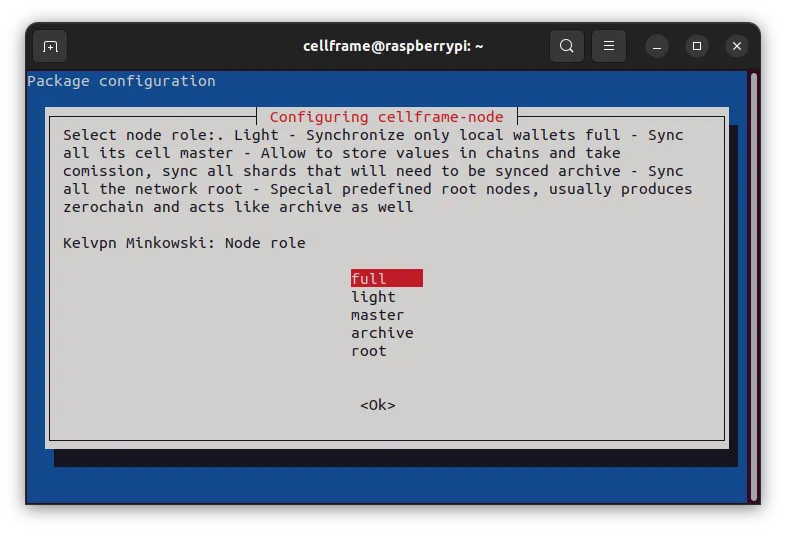


After you answer all the questions, installation will continue and it will start automatically as a service.
If you want to change some of these settings, just use command dpkg-reconfigure cellframe-node and you can start again from the beginning.
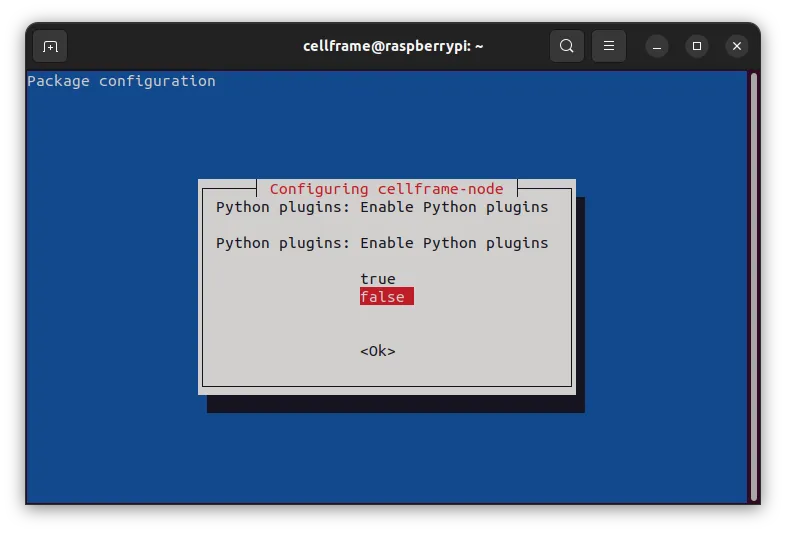
Enabling the loading of Python plugins manually after installation
If you for some reason didn’t enable the plugins during installation, you can enable the plugins later by modifying cellframe-node.cfg file.
As I mentioned earlier in this article, Cellframe node has a powerful SDK built in. To unleash the power of plugins, you need to edit the configuration file cellframe-node.cfg .
To do that, we’ll use nano text editor. Run command nano /opt/cellframe-node/etc/cellframe-node.cfg and press down arrow key until you see something like this on your screen:# Plugins
#[plugins]
# Load Python-based plugins
#py_load=false
# Path to Pyhon-based plugins
#py_path=/opt/cellframe-node/var/lib/plugins
To enable the loading of plugins, you need to uncomment a few lines and set py_load=false to py_load=true . After editing the file, this part of the file should look like this:
# Plugins
 [plugins]
 # Load Python-based plugins
 py_load=true
 # Path to Pyhon-based plugins
 py_path=/opt/cellframe-node/var/lib/plugins
After you’re done editing, press Ctrl+X, answer Y to “Save modified buffer?” and press enter. After that, just restart Cellframe node with the command systemctl restart cellframe-node and you should be good to go.
The path for installing the plugins will be at /opt/cellframe-node/var/lib/plugins by default. Plugins directory is missing by default but you can create it with mkdir -p /opt/cellframe-node/var/lib/plugins .
Some useful commands
Upgrade your system and nodesudo apt update && sudo apt dist-upgrade
Show status of Cellframe node servicesystemctl status cellframe-node
Show last 50 lines of Cellframe node logfilecat /opt/cellframe-node/var/log/cellframe-node.log | tail -n 50
Restart Cellframe node servicesystemctl restart cellframe-node
Stop Cellframe node servicesystemctl stop cellframe-node
Troubleshooting
"Debian not booting, nothing happening on screen."
Possibly a bad SD card, image file corrupted or image writing failed. Try to rewrite the image to the SD card.
"Cellframe node is not starting."
Make sure you have installed all the necessary dependencies. Check the log files for more information. Run it manually from /opt/cellframe-node/bin/cellframe-node and see if it produces any errors.
Interested building on Cellframe?
Join their development Telegram channel: https://t.me/cellframe_dev_en
You can also contact me if you’re interested building something on the future of blockchains:
Telegram: @CELLgainz
Twitter: @CELLgainz
Recent news